Cleaning Up After a Big Paint Job? Here is How to Clean Your Paint Brush the Right Way!
by Guest Post on Dec 4, 2016
Have you recently moved into a new house or apartment that you want to give a fresh look? Have you picked out all your paint colors and bought new brushes? If you're equipped with the right supplies to execute your new painting project, you'll need to remember that you've only done half your homework.
That's because the investment you've made in your painting supplies is all a loss if you don't put in as much time into proper cleanup as the amount of money you've put into acquiring your supplies.
Knowing how to clean your paint brushes the right way is a critical skill that will save you from having to buy new brushes every time you need to paint a wall. Proper cleaning also helps to ensure that your brushes stay nearly perfect over their lifetime so you can maintain your investment in them.
Are you ready to learn how to clean a paint brush the right way? Follow our quick guide for expert tips for cleaning brushes you've dipped into both latex and oil paints. Cleaning up takes patience and attention to detail -- but once you've got the hang of it, you'll get quicker at the process. Let's get started with removing that paint!
Latex Paint
Latex paint is water-based, so the only liquid you actually need to clean your paint brushes is water! (Be forewarned: You may need to do a little scraping if the paint on your bristles has dried!)
Step #1: Soak in Warm Water
One of the easiest ways to loosen latex paint from the brush is to first soak the brush in warm water. So fill up your sink with warm water and throw in the brushes. Allow them to soak for 10 minutes.
Step #2: Wash and Repeat
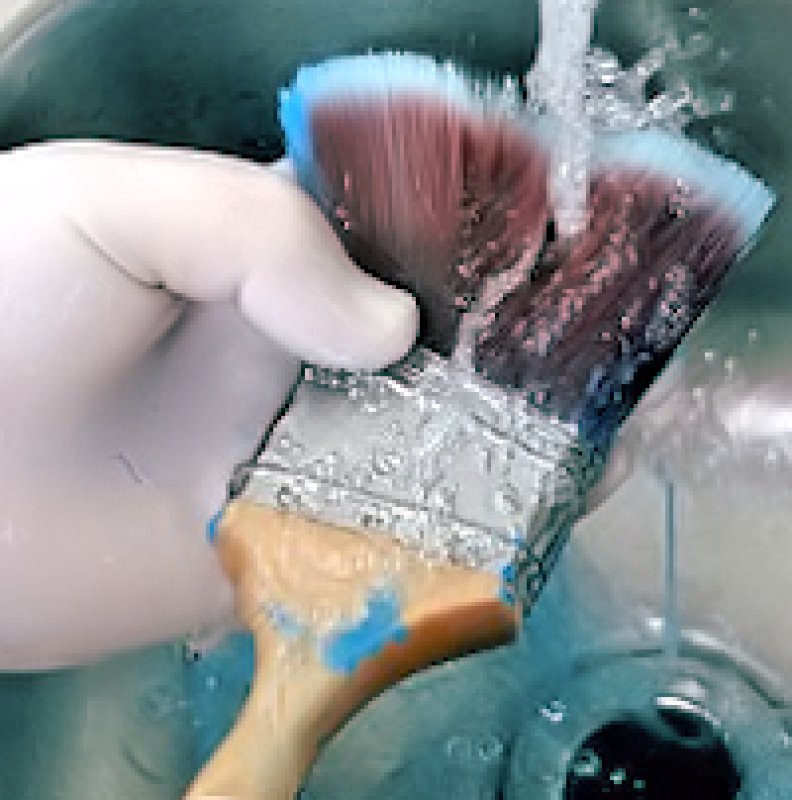
Once your brushes have soaked, empty the water from the sink and begin running warm water over them one at a time. Use your hands to lightly flip the brushes, making sure not to bend them too far or crinkle them, so that the paint can easily flow from the brush. While the water still is flowing, press the brush back and forth against the bottom of the sink to continue freeing paint that is trapped inside the brush. Continue doing this with each brush until the water is flowing clearly.
Step #3: Scrape Your Brushes
There are lots of different tools you can buy to scrape dried paint off your brushes, but one of the most effective tools you have is your fingers. Gently scrape any dried flakes from the bristles by placing the brush flat against your sink and pressing your fingers down the length of the brush. Scrape in the direction of the bristles to help ensure the bristles remain straight and in their proper place.
Step #5: Whip It!
Next, go outside and forcefully shake each brush by whipping it up and down. This releases all the water from the brush so that it can dry properly.
Step #6: Store Your Brushes Properly
Place your brush flat against a dry paper towel. Cover and allow to dry. When the brush if completely dry shake out again and then put back in its protective cover. Store your paint brushes by hanging them up to avoid the tips' curling.
Oil-Based Paint
If you are using oil-based paint which is often used to paint wooden furniture, you will not be able to use water to clean your brushes. If you try this, your brushes will turn into a sticky mess. You'll need to use a solvent like mineral spirits to clean up.
Step #1: Make a Mineral Spirits Soak
Fill a solvent-safe bucket with mineral spirits according to the packaging instructions. Usually this means filling the bucket with enough solvent to get brush head where paint has dried immersed in the solvent. Allow the brushes to soak for 10-15 minutes, depending how much paint has dried.
Step #2: Comb It Out
Oil-based paints are when you can really use a brush comb. Use it to gently move through the bristles in a downward motion to release the paint. Continue dipping the brush head in the solvent as you go to further wash out the paint.
Step #3: Dump and Repeat
Dump your dirty solvent into a dedicated waste area or bucket and fill it back with new, clean solvent. Dip your brushes back into the solvent to further release trapped paint. Repeat the process of combing and dipping your brush head until it is completely clean.
Step #4: Dry and Store
After your brush head is completely clean, shake out the solvent (make sure you are wearing goggles so you don't get any in your eye or mouth), and lay flat on a clean cloth or paper towel. Store the same way you would latex-paint brushes once they are dry.
In conclusion, if you don't take care of your paint brushes by cleaning them properly after you have used them -- you not only are going to cause the deterioration of your paint brushes over time but you literally are going to waste your money because you're going to have to buy brand new paint brushes the next time you have a paint job at your house or apartment.
Now, if you follow our quick and easy guide for properly cleaning your paint brushes, then you'll actually be able to maintain your paint brushes and keep your collection over their lifetime. Keeping them in great condition is all about after-care, so make sure you're not letting your paint brushes dry out or letting paint get too far up the length of the bristles.
Keep these pro tips in mind as you take on your next big paint job -- and enjoy the process as you makeover over new home!
Popular Articles
Three Places to Spend Money on the Exterior of Your Home
When you have the exterior of your home remodeled, you are investing, time, energy and convenience into the project and you want to make sure that...
107393 Views
Homemade Headboards-Make an Upholstered or Wooden Headboard
Homemade headboards can add a lot of personality to any bedroom. They can be coordinated with existing furniture and room decor or they can be the...
81003 Views
When to Use a Brush, Roller or Sponge Brush
Brushes are a good choice for painting trim and woodwork. They are also useful for cutting in the edges around the top and bottom edges and corners...
73559 Views
Creating a Cottage Kitchen with Bead Board
Kitchen decor can range from modern and bold to elegant and elaborate by using strategic kitchen pieces. One of the most popular decorating trends...
59381 Views
Gas Fireplace Diagnostics and Troubleshooting
Follow these steps for diagnosing and troubleshooting Gas Fireplaces repairs. For the average DIYer, this may seem intimidating, depending on the...
36320 Views
Latest Articles
Signs You Need Professional Plumbing Repair: Don’t Ignore These Warning Signs
Ignoring the signs of a pending plumbing disaster can lead to significant damage and costly repairs. For instance, homeowners might not realize...
on Jan 20, 2026
Beneath the Surface: Why Professional Trenchless Sewer Line Repair
Beneath the Surface: Why Professional Trenchless Sewer Line Repair is Essential for Modern Homeowners
on Jan 14, 2026
Hydro Jetting Services: Unclog Your Pipes with the Power of Water
When faced with stubborn clogs and slow drains, conventional solutions often fall short. But with the innovation of hydro jetting services,...
on Dec 15, 2025
Why Professional Heat Pump Installation is Key to Maximizing Efficiency and Longevity
Heat pumps are a highly efficient means of heating and cooling homes, reducing energy costs and contributing to environmental sustainability. To...
on Dec 15, 2025
Why Professional Boiler Repair is Essential for Home Safety and Comfort
Maintaining a warm and safe home environment is paramount for any homeowner. Your home's boiler system plays a critical role in this, but what...
on Nov 5, 2025
Featured Articles
What Type of Licensed Contractor Should You Hire?
on Feb 28, 2017
Hire Contractors / Estimates

Looking for a specialty project? There are many types of contractors available for your home improvement needs. Finding the right type of...
Actions
Top Categories
- Garden / Landscaping / Patio — 264
- Kitchen / Bathrooms — 240
- Real Estate / Finance — 203
- Appliance / Repair — 186
- Interior Design / Decor — 184
- HVAC / Air Conditioning — 150
- Cleaning / Maintenance — 144
- Improvements / Remodeling — 131
- Plumbing / Basements — 121
- Floors / Tile / Hardwood — 116
- Safety / Security — 114
- Doors / Garages — 113
Articles Archive
More DIY Articles
Concrete Foundation Repair Methods
If you have noticed when looking at the outside of your home cracked foundation, displaced moldings, cracked bricks, or separation from windows or...
Things to Know about Garage Door Windows
Thinking of installing garage doors with windows? Want to add windows to the existing garage door? Learn all you need to know about garage door...
Why MDF is Better than Softwood
MDF skirting boards have become a popular alternative to the normal standard softwood. Should you ever find yourself needing to match existing...
Wooden Creativity: Learn from These 3 Resources and Become a Professional Carpenter
Do you have the conviction that you can work wonders with your hands? Have you been dreaming of creating magnificent structures from wood? Would...
Why Replacing You Vacuum Cleaner is Better than Repairing the Old One
Considering the hectic lifestyles and urge for swift solutions these days, one of the most important devices all homes need is a handy and reliable...