How to Repair the Seat in a Cane Chair
by Guest Post on May 25, 2010
For the handy do-it-yourself homeowner, repairing the seat in a cane chair is a task that can be completed relatively easily with some basic instructions. However, for those who do not excel in-home repairs, crafts or do not enjoy doing such activities, it may be wise to outsource the repairing of a cane chair. Cane chairs are usually quite comfortable and can last from generation to generation. The six steps below describe the basic process for repairing a cane chair.
Having the right tools is an essential part of successfully repairing a cane chair. Gather needle nose pliers, a screwdriver, a cane straightener, and a pair of tweezers. Choose a cane that is the same size as is currently in the damaged seat for the best fit.
Step 1
Remove all the old cane from the chair seat. Be sure the holes are free of dirt and debris to make the re-caning process easier.
Step 2
Place several canes in a water/glycerin bath to soften them for installation. Then string the chair from front to back, keeping the cane loose and straight.
Step 3
Run horizontal strips through the side holes and across the vertical cane.
Step 4
It is time to begin weaving the cane. Working with the second set of vertical canes, run the pieces under and over the horizontal strips (i.e. - under the first, over the second, under the third, etc.). Repeat for the remaining vertical holes. For the horizontal holes, begin running the cane over and then under the vertical pieces. Continue for the remaining holes. Straighten all cane once woven in. This step is the most time consuming of all the steps.
Step 5
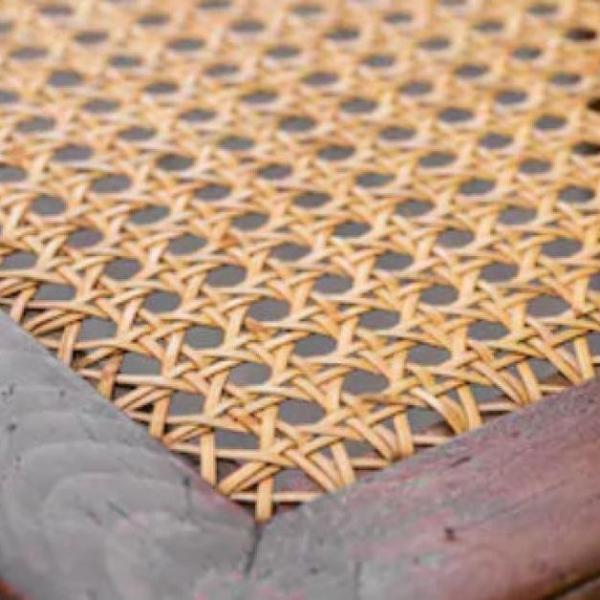
Step 5 works the cane on the diagonals. Start from any corner that is easy to work with and run the cane at a straight diagonal. Weave over the vertical pieces and under the horizontal pieces. Continue this pattern for all the diagonal holes. Be sure that the cane is being strung through the correct holes before continuing with the rest of the chair.
Finish the diagonals by working the next set of strands in the opposite manner. Run them under the vertical pieces and over the horizontal ones. A natural "x" will form in the pattern. Use care when slipping these final pieces into place, making sure that the cane sits neatly within the space of the cane that has already been woven.
Step 6
Finish the chair with a cane border around the outer edges. This will help provide a polished, finished look while making sure that the cane sits flat on the chair.
A novice caner can expect to spend a few days repairing a chair, whereas, an experienced caner can have a chair repaired in about a day. Seek out the advice and hands-on help of friends and family who have repaired cane before if questions arise. Taking the time to properly repair the seat in a cane chair will ensure that it lasts for many years to come.
Popular Articles
Three Places to Spend Money on the Exterior of Your Home
When you have the exterior of your home remodeled, you are investing, time, energy and convenience into the project and you want to make sure that...
108467 Views
Homemade Headboards-Make an Upholstered or Wooden Headboard
Homemade headboards can add a lot of personality to any bedroom. They can be coordinated with existing furniture and room decor or they can be the...
81313 Views
When to Use a Brush, Roller or Sponge Brush
Brushes are a good choice for painting trim and woodwork. They are also useful for cutting in the edges around the top and bottom edges and corners...
74237 Views
Creating a Cottage Kitchen with Bead Board
Kitchen decor can range from modern and bold to elegant and elaborate by using strategic kitchen pieces. One of the most popular decorating trends...
59674 Views
Gas Fireplace Diagnostics and Troubleshooting
Follow these steps for diagnosing and troubleshooting Gas Fireplaces repairs. For the average DIYer, this may seem intimidating, depending on the...
36547 Views
Latest Articles
Signs You Need Professional Plumbing Repair: Don’t Ignore These Warning Signs
Ignoring the signs of a pending plumbing disaster can lead to significant damage and costly repairs. For instance, homeowners might not realize...
on Jan 20, 2026
Beneath the Surface: Why Professional Trenchless Sewer Line Repair
Beneath the Surface: Why Professional Trenchless Sewer Line Repair is Essential for Modern Homeowners
on Jan 14, 2026
Hydro Jetting Services: Unclog Your Pipes with the Power of Water
When faced with stubborn clogs and slow drains, conventional solutions often fall short. But with the innovation of hydro jetting services,...
on Dec 15, 2025
Why Professional Heat Pump Installation is Key to Maximizing Efficiency and Longevity
Heat pumps are a highly efficient means of heating and cooling homes, reducing energy costs and contributing to environmental sustainability. To...
on Dec 15, 2025
Why Professional Boiler Repair is Essential for Home Safety and Comfort
Maintaining a warm and safe home environment is paramount for any homeowner. Your home's boiler system plays a critical role in this, but what...
on Nov 5, 2025
Featured Articles
What Type of Licensed Contractor Should You Hire?
on Feb 28, 2017
Hire Contractors / Estimates

Looking for a specialty project? There are many types of contractors available for your home improvement needs. Finding the right type of...
Actions
Top Categories
- Garden / Landscaping / Patio — 264
- Kitchen / Bathrooms — 240
- Real Estate / Finance — 203
- Appliance / Repair — 186
- Interior Design / Decor — 184
- HVAC / Air Conditioning — 150
- Cleaning / Maintenance — 144
- Improvements / Remodeling — 131
- Plumbing / Basements — 121
- Floors / Tile / Hardwood — 116
- Safety / Security — 114
- Doors / Garages — 113
Articles Archive
More DIY Articles
Care and Cleaning of Marble Floors
If you have even a scrap of marble in your home, consider yourself fortunate to be in the presence of one of the most beautiful stones around....
Drought Management Strategies
As a concerned gardener, I have been dismayed by recent weather news - the drought plaguing much of the country has become extremely serious! My...
Fixing Carpet Bleach and Chemical Stains
The number and variety of chemical substances that can cause carpet spots and carpet stains boggle the mind. When you're faced with unsightly...
Five Ways to Fund Your Property Purchase
Property purchases can be funded in a variety of ways. Whether you are looking to buy a home or a commercial property of any kind, it is worth...
5 Tips for Hiring a Reliable Painting Contractor
Owning a house comes with rewards and burdens. If there’s one thing every homeowner can agree on, it’s that maintenance can be intimidating....