Easy Wall Crack Repairs on Smooth and Textured Surfaces
by Guest Post on May 7, 2012
For centuries, builders have been surfacing their home and building constructs with textured masonry and other stucco finish materials as a cost-saving short-cut to producing consistent looking profiles. For example, why do most new homes have blown stucco ceilings (aka - "popcorn")? Producing a visually flat ceiling (or wall) surface takes a great deal of time and materials. And it takes master plastering skills to hide the flaws of uneven drywall and finish each tape join with the required 3 coats of plaster drywall compound. But with a textured coating, the builder can throw up the drywall roughly as it may sit, tape it with only a single coat of plaster and the resulting flaws all disappear under the illusion of a "level" textured surface. The results look new and even, the builder saves time and money and hopefully passes those savings on to you. It's a perfect solution!... Until it cracks.
Fixing a smooth surface crack
When a crack develops on a flat wall or ceiling, the repair is rather simple. You cover it with a strip of paper tape (if indoors) or mesh tape (indoors or out), skim over it with your putty knife and the appropriate interior or exterior patching compound in three thin coats (each one wider than the last to float it out with the surrounding surface as smooth as possible) and sand it just enough to remove any edges.
Smooth plastering like this is easy to achieve with some practice once you've grasped these fundamentals. And while you're practicing, there are no errors that can't be easily fixed with either a little more plaster or a little more sanding. The most common mistake is in applying the compound too thick. This creates excessive sanding and bulgy looking patches.
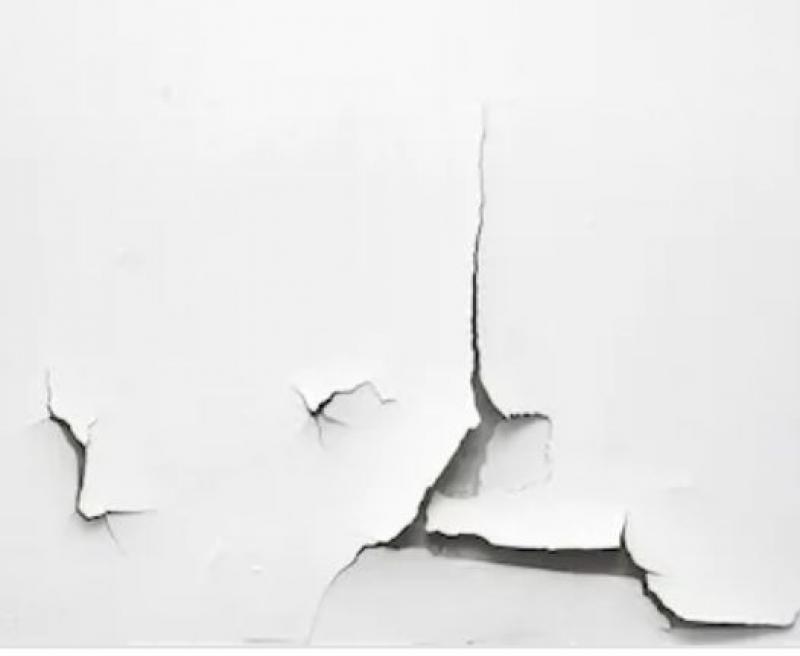
But what about the crack on a textured surface? You can't just tape, skim coat and sand it. The result would be a long flat patch in the middle of a textured profile (which I've seen far too many homeowners stuck within my career). It stands out like a bad rash and adds insult to injury. You can't undo or fix a repair like this. The only way to get rid of a bad stucco repair is to remove all the textured material on the entire surface and replace it with new. That's a costly venture and can be avoided if the repair was done properly the first time.
Working with textured materials
There's often the misconception that one can simply remove the textured coating of masonry or popcorn stucco (or what have you) from around the damaged area to fix the substrate and then replace the textured material on just this spot. It sounds reasonable in theory so long as you're using the same material as a replacement. But in practice, it's almost always impossible.
With a great deal of skill and expertise, a finisher can bevel the outer edges of the damaged area so that when the new material is applied over the exposed substrate (drywall, brick, concrete, etc.) it can be gradually eased toward the outer edges without overlapping the surrounding material to keep it level with the existing grade. But even this shows a slight ridge around the repair and is noticeable to those who know it's there… namely, YOU. And this is the best that can be done without complete replacement. The more common approach I've seen people try is to simply try covering the crack with more of the same material used on the overall surface. The problem with this is that anything you add to the surface of a textured profile only magnifies where the damage is with a hump in a sea of bumps. So what do you do if you're not a master mason and don't want to spend the money on complete removal and replacement of your stucco just to fix some cracks?
Easy crack repair for textured surfaces
To understand how to repair a crack one should have an understanding of the anatomy of the crack. Sometimes created by sudden impact, sometimes by the long (or short) natural process of shifting and settling and often by water leaks, the crack is a break in the solid substrate. And through the laws of weight and gravity, the crack can only shift, grind and grow. It never gets smaller and it rarely stays the same. No matter how you repair the crack, you'll only mask it from the eye while it continues to thrive below the surface waiting for its chance to reappear. That is unless you want to go through the costly and messy process of replacing the entire substrate. But who wants to do that if there's an easier way?
Ultimately, you want a repair to be invisible or at least, depending on the severity of the damage, unobtrusive to the eye. To accomplish this in the middle of a textured surface, the repair has to fill the crack, preserve the surrounding texture and not reopen as the surface shifts over time. Solid drying fillers such as plaster and drywall compound can easily fill in the crack but do little to preserve the texture and usually result in bad approximations of the surrounding surface at best. They also dry hard and brittle allowing the underlying crack to easily break through the surface in a short time. So the ideal material must remain flexible to keep up with the movement of the crack and it has to make the crack disappear within its native profile. What can do all this and be easily applied? Latex caulking.
Simply run a small bead of latex caulking along the surface of the crack, wet your fingers with a little warm water as a lubricant and massage the caulking into the crack while "washing" it into the surrounding texture. Make sure the crack is thoroughly filled and the excess caulking around the edges is thinly blended into the texture. Let it dry thoroughly and then paint over with latex paint to preserve the elasticity. It's as easy as that! But never use silicone caulking for this type of repair as you can't paint over it.
In cases where you can't paint the surface for one reason or another (e.g.- a very large exterior wall in an unpainted tinted masonry), use colored caulking that best resemble the surface color and be sure to wash away as much of the material from the outer edges of the crack as possible before it dries.
A flexible repair is a lasting repair. As your home shifts expand and contracts so do your latex caulking crack filler.
Popular Articles
Three Places to Spend Money on the Exterior of Your Home
When you have the exterior of your home remodeled, you are investing, time, energy and convenience into the project and you want to make sure that...
107977 Views
Homemade Headboards-Make an Upholstered or Wooden Headboard
Homemade headboards can add a lot of personality to any bedroom. They can be coordinated with existing furniture and room decor or they can be the...
81181 Views
When to Use a Brush, Roller or Sponge Brush
Brushes are a good choice for painting trim and woodwork. They are also useful for cutting in the edges around the top and bottom edges and corners...
73726 Views
Creating a Cottage Kitchen with Bead Board
Kitchen decor can range from modern and bold to elegant and elaborate by using strategic kitchen pieces. One of the most popular decorating trends...
59552 Views
Gas Fireplace Diagnostics and Troubleshooting
Follow these steps for diagnosing and troubleshooting Gas Fireplaces repairs. For the average DIYer, this may seem intimidating, depending on the...
36454 Views
Latest Articles
Signs You Need Professional Plumbing Repair: Don’t Ignore These Warning Signs
Ignoring the signs of a pending plumbing disaster can lead to significant damage and costly repairs. For instance, homeowners might not realize...
on Jan 20, 2026
Beneath the Surface: Why Professional Trenchless Sewer Line Repair
Beneath the Surface: Why Professional Trenchless Sewer Line Repair is Essential for Modern Homeowners
on Jan 14, 2026
Hydro Jetting Services: Unclog Your Pipes with the Power of Water
When faced with stubborn clogs and slow drains, conventional solutions often fall short. But with the innovation of hydro jetting services,...
on Dec 15, 2025
Why Professional Heat Pump Installation is Key to Maximizing Efficiency and Longevity
Heat pumps are a highly efficient means of heating and cooling homes, reducing energy costs and contributing to environmental sustainability. To...
on Dec 15, 2025
Why Professional Boiler Repair is Essential for Home Safety and Comfort
Maintaining a warm and safe home environment is paramount for any homeowner. Your home's boiler system plays a critical role in this, but what...
on Nov 5, 2025
Featured Articles
What Type of Licensed Contractor Should You Hire?
on Feb 28, 2017
Hire Contractors / Estimates

Looking for a specialty project? There are many types of contractors available for your home improvement needs. Finding the right type of...
Actions
Top Categories
- Garden / Landscaping / Patio — 264
- Kitchen / Bathrooms — 240
- Real Estate / Finance — 203
- Appliance / Repair — 186
- Interior Design / Decor — 184
- HVAC / Air Conditioning — 150
- Cleaning / Maintenance — 144
- Improvements / Remodeling — 131
- Plumbing / Basements — 121
- Floors / Tile / Hardwood — 116
- Safety / Security — 114
- Doors / Garages — 113
Articles Archive
More DIY Articles
Are Cash Home Buyers Legit? Answering 5 Common Questions About Selling a House for Cash
Are homebuyers who pay cash and promise quick closings legit? If you have a home on the market and especially if you’re looking for a quick sale,...
Deciding Between Light or Dark Colored Kitchen Cabinets
No matter how comfortable your den or living room is family and friends tend to gather in the kitchen. It seems to be the heart of the home and...
How to Build an Awesome Home Theater Gaming System
Setting up a home theater gaming system can be a lot of fun. Doing a little research first, then make a few field trips to see the potential...
Common Problems with Automatic Garage Doors
Most homeowners invest in an automatic garage door for convenience. When the door stops responding or gets stuck in an open position, it can be...
Top Reasons to Hire a Bee Control Professional
It is normal for you to consider your home the property that you have in order to live and thrive in it. This is why you act like it is a valuable...