Wallpapering: How to Hang Wallpaper and Border
by Guest Post on Jan 14, 2011
How to Determine the Amount of Wallpaper You Need
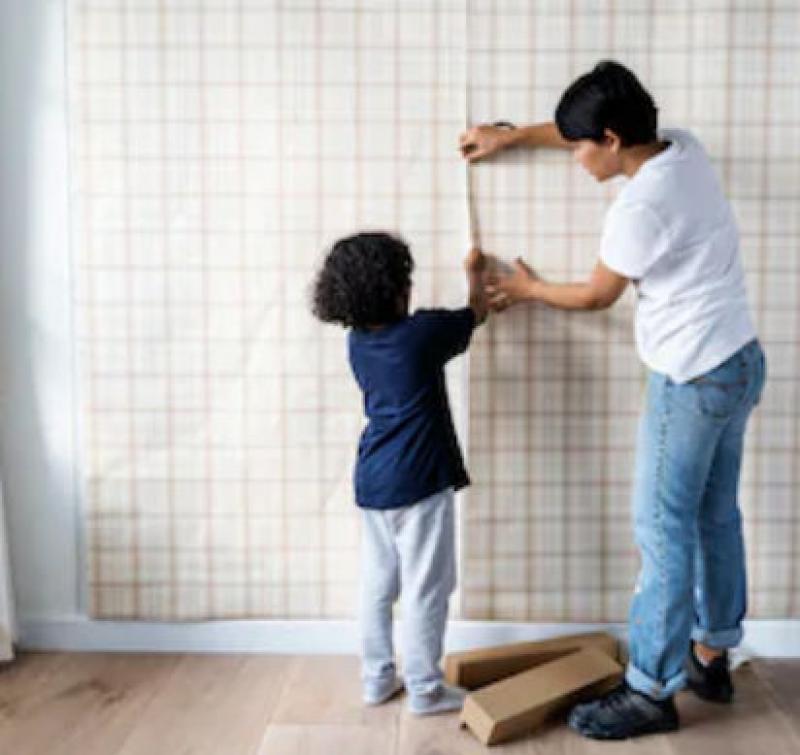
A single roll of wallpaper contains 36 square feet of paper. American wallpaper is sold in bolts of single, double or triple rolls with varying widths. Follow these steps to compute the number of single rolls you'd need for a room: (Place the graphic to the right of the steps)
Measure the length and width of the room. Round off to the nearest foot. Add these numbers together. Assume you're papering a bathroom and it is 6 feet wide and 10 feet long. (6 + 10 = 16)
Multiply that number by the room height (baseboard to ceiling), which we'll say is 8 feet. (16 x 8 = 128)
To compute the area of square feet in that room, double the above number. (128 x 2 = 256)
From this number, subtract window and door space. As a rule, windows are 15 square feet and doors are 21 square feet. Take the square footage you computed for the room, 256 and subtract the window and door square footages. (256 - (15+21) = 220
Since American rolls of wallpaper contain 36 square feet total, we know some of that will be wasted with extra cuts and pattern matching. So let's allow for 28 square feet out of the total 36. Divide your final room square footage by 28 to determine how many single rolls you'll need. (220 / 28 = approximately 8 single rolls)
How to Prepare an Existing Wall Surface for Wallpapering
Before you begin papering, your goal should be to make the wall surface as smooth as possible. After this is done, shine a light (work lamp, flashlight) sideways across the wall's surface. Irregularities will cast shadows, allowing you to see if you missed anything.
Also allow any spackling, plaster, primer to dry completely prior to hanging any wallpaper.
Tools Needed to Prepare an Existing Wall Surface for Wallpapering
- Save by shopping online
- Paint roller
- Safety glasses
- Bucket and rubber gloves
- Dust mask
- Screwdriver
- Putty knife
- Triangular scraper
- 1x3 lumber scrap
- Nail set
- Wallpaper steamer
- Sanding block
- Utility knife
- Hot air gun
- Broad knife
- Wide paintbrush
- Hammer
- Sponge
- Household iron
- Line Laser Level Tool
Materials List for Preparing an Existing Wall Surface for Wallpaper
- Sandpaper
- Chemical wallpaper remover
- Spackling compound
- Joint compound or plaster
- Neutral household cleaner
- Lining paper (optional)
- Iron-on patching tape
- Oil-based primer or sealer
- Heavy-duty extension cord
How to Remove Wall Fasteners
- Place your 1x3 lumber scrap beneath the hammerhead to protect the wall so you can remove nails, hooks, etc.
- Any existing wall anchors need to be knocked back to just below the surface of the wall with a nail set.
How to Prepare a Wallpapered Surface
- Wipe over any loose sections of the existing wallpaper with a wet sponge. This reactivates the adhesive so the paper again sticks to the wall. Let it dry. Tip: To determine if the old adhesive is still good, run your hand over the old wallpaper. If you hear a crackling sound, this indicates loosened wallpaper.
- Exceptionally the loose paper should be torn off. Try to feather the torn edges to reduce sanding later.
- Using the utility knife, cut through the wallpaper at corners and remove loose edges. Cut through the paper around the window and door frames also.
- Sand any bumps, irregularities, including seams and edges. Remove any dust and dirt by washing the walls with a damp sponge.
- If the wallpaper is bubbled, you can reglue it by cutting a criss-cross into the bubble. Apply glue to the back and press them into place again. Or, simply remove the bubble by tearing the loose section off. Tip: If bubbles are widespread, remove the old paper completely. The new wallpaper covering will stick better.
How to Use Lining Paper on an Existing Wall Surface
- Coat the back of the lining paper with adhesive. A paint roller works well to do this.
- Hang the strips of lining paper about 1/8 inch apart. Also, leave that much space between the lining paper and molding or trim. Lightly press the seams with a damp sponge. Allow drying.
How to Fill Cracks and Holes in an Existing Wall Surface
- Any loosened bits of plaster or peeling paint needs to be removed with a sharp-edged scraper such as a triangular scraper.
- Fill any dents, cracks, holes, etc. with a spackling compound. Blend the edges into the surface, smoothing it out.
- Wide cracks or holes can be fixed with iron-on patching tape. Be sure to cover the hole completely, then apply a layer of joint compound over the tape, smoothing out the edges.
- Sand the dried patched areas. Wash with a damp sponge to remove dirt and/or dust.
- When the patched areas are completely dry, seal with an oil-based primer. If you don't, the alkalis in the plaster will keep the wallpaper from adhering.
How to Paper Bare Walls
Before papering new walls, prime them first. Paint an oil-based primer on the walls with a roller. Using an oil-based primer creates a hard surface whereas latex paint will simply soak in. Sizing comes next. This important step is the bond between the wall and the paste. It is usually a blue color, which makes it easy to see where you've covered over the white primer.
Wallpaper manufacturers will usually include specifications and instructions with double-roll packages. Included will also be the distance from one repeat pattern to the next, called the "drop."
Most wallpaper today comes with a washable plastic coating. If you see the word "strippable," this means the paper will be easy to remove, a handy convenience for future repapering projects. Vinyl wallpaper is heavy and has a tendency to stretch, requiring special hanging instructions.
If your home or building is not a fairly new one, chances are the rooms are not "plumb" or perfectly vertical. To make this less obvious, avoid vertical striped patterns. If the trim needs repainting, do this first prior to hanging the paper.
Tools You Will Need to Paper Bare Walls:
- Bucket
- Paste brush
- Paint roller
- Broad or spackling knife
- Sponge
- Straightedge/combination square
- Sandpaper and sanding block
- Roller
- Wallpaper brush
- Utility knife
- No. 1 hard pencil
- Scissors
- Tape measure
- Stepladder or stool
- Flat surface
Materials List for Papering Bare Walls:
- Primer
- Wall sizing
- Wallpaper
- Premixed wallpaper paste
How to Prepare, Measure, Cut and Paste Bare Walls:
- To protect walls from moisture and make stripping easier later, apply an oil-based primer. Let dry to a hard finish; sand lightly.
- Cover the walls entirely and evenly with sizing so the paste will adhere.
- To begin hanging your wallpaper, use a level tool to determine a true vertical guideline from the floor all the way to the ceiling. The guideline should be the width of a roll of wallpaper and 8 inches away from an inconspicuous corner.
- Now measure the distance from the baseboard to the ceiling. Add about 4 to 5 inches to it and mark this on your first wallpaper strip. Tip: Do this on the back of the wallpaper so pencil lines don't show up.
- Cut the first strip using a sharp utility knife and straightedge. Subsequent strips may need to increase in length to match patterns.
- Using a brush, apply the paste starting at the top. If no arrows are present on the back of the wallpaper, turn it over to determine direction. Tip: You may find a roller works better and faster than a brush to apply the paste.
- Fold over about one-sixth of the paste-coated strip from one end allowing the pasted sides to rest against each other. DO NOT crease the fold. It will remain when you hang it.
- Do the same from the other end, allowing the two edges to almost touch each other. This is called "booking."
How to Hang Wallpaper
- Drape the pasted strip (pasted side up) over your arm like a towel. Place the top of the paper just a couple of inches over the ceiling line.
- Holding the right edge of the paper against the vertical guideline you drew earlier, unfold the top section and press into place.
- Brush the positioned strip to remove air bubbles, starting from the top down, and from the center to the sides.
- Unfold the bottom half and position against the vertical line. Brush as quickly as possible since paste dries and gets more difficult to remove the air bubbles.
- To trim excess paper from the ceiling joint, press the broad knife blade into it to form a crease. Cut the excess with the utility knife using the broad knife as a guide. Wipe off any excess paste.
- Brush the strip one more time and remove the excess from the baseboard or bottom the same as above. Tip: If you brush as you go, there's less chance of air bubbles forming. In case you do get a bubble that's impossible to brush out, poke it with a pin and work the air out before it dries.
- The next and subsequent strips you hang should be 1/4 inch apart initially. With gentle pressure, slide the paper into place. If it does not move easily, lift gently, reposition and then brush.
- About 10 to 15 minutes after the paper has been up, firmly press seams with a roller. Wipe off any excess paste.
How to Fit Wallpaper Around Obstacles
- Wallpapering around doors, windows and shelves are tricky. To simplify these areas, it's best to put up a whole strip and brush it into place. Position it as close to the obstacle as possible, pressing it as far as it will go.
- Cut the wallpaper diagonally with scissors at the top/bottom corners of doors or window frames. One section can now extend along the horizontal edge and the other vertically.
- Brush the horizontal section into place first. Press the broad knife into the creases and cut with your utility knife, using the broad knife as a guide.
- Now do the same for the vertical edge.
- If the obstacle is particularly difficult to fit around, such as a window sill, use your hand to crease the paper into the smaller places. Use a towel or washcloth in those exceptionally tight spots to press the paper into place.
- Horizontally cut the paper above and below the obstacle. For the bigger cuts, use scissors. Smaller cuts should be made with your utility knife.
- Brush the positioned sections into place. You may need to make more small cuts for a proper fit.
- The final paper cuts should be made only after the strip is brushed into place.
- Safety tip! Turn the power off when working around switches and outlets. Remove the plates and paper over. Cut an X to expose fixtures.
- Trim the paper around the inside edges of the outlet using the broad knife and utility knife, then replace the faceplate.
How to Wallpaper a Bathroom
Because bathrooms are so humid, they present unique problems when it comes to wallpaper. In addition to that, there are so many obstacles to work around -- sink, toilet, shower/tub, mirror, etc.
Choosing the correct type of wallpaper for your bathroom is important. The preferred choice is prepasted vinyl (paper- or cloth-backed.) Vinyl wallpaper will withstand moisture and is durable. The prepasted feature makes it easier to use. Instead of a large worktable to spread the paste, the bathtub makes an excellent trough to fill with water and dip the wallpaper which activates the adhesive.
Another key to successful bathroom wallpapering is proper wall preparation. In a very humid bathroom, the wallpaper will tend to bubble and peel off more quickly. Proper preparation will help avoid this potential problem.
After you pick out your wallpaper, take a sample piece home and rub it with a wet sponge. This tests for colorfastness. Next, tear the wet sample. If it tears easily, this particular wallpaper choice will be hard to work with.
Tools Needed to Paper the Bathroom:
- Bucket and rubber gloves
- Straightedge
- Tape measure
- Sponge
- Wallpaper steamer
- Plumb bob
- Scissors
- Sandpaper and sanding block
- Safety glasses
- Paste brush
- Seam roller
- Paintbrush
- Chalk line
- Broad knife
- Wallpaper brush
- Paint roller
- Utility knife
Materials list for Papering the Bathroom:
- Household detergent
- Spackling compound
- Alkyd or oil-based primer-sealer
- Wall sizingWallpaper paste
- Vinyl-to-vinyl wallpaper paste
- Lining paper
- Wallpaper
How to Remove Old Wallpaper In Your Bathroom
You might be considering papering over the old wallpaper in your bathroom because it's in good condition. Don't! The water used to apply the new paper will loosen the old. The weight of both layers will eventually cause the paper to pull itself from the wall.
Soaking. If you have sheetrock (wallboard), wood or plaster in your bathroom, cut a slit every 8 inches in the wallpaper horizontally with your utility knife, OR sand the wallpaper lightly. This allows water to penetrate. Sponge down the walls an area at a time with a household detergent solution. If the wallpaper is stubborn in coming off, soak thoroughly with the detergent solution or use a chemical wallpaper remover. You can now remove the old wallpaper with your fingers. You may want to use a putty knife.
Steaming. You can also steam stubborn wallpaper from plaster and wood walls. Steamers can be purchased or rented. Just fill the tank with water and when steam appears, press it against the wallpaper for about 30 seconds. Scrape the steamed paper off with a putty knife. Do not use a steamer on wallboard because along with the paper will come the wallboard's top layer.
How to Prepare Bare, Painted or Previously Papered Bathroom Walls
- Remove the old wallpaper. See How to Remove Old Wallpaper in Your Bathroom.
- If there any noticeable cracks or dents in the wall, fill them with spackling compound and a broad knife. Let it dry and sand it smooth using sandpaper on a sanding block.
- Remove any dust created by the sanding with a wet sponge or cloth.
- Apply an alkyd or oil-based primer-sealer with a short-napped paint roller.
How to Prepare Textured and Bare Wood Bathroom Walls
Lining Paper. Lining paper helps disguise the most severe wall texture problems. See How to Use Lining Paper.
Joint compound. This method takes longer to do but costs less. Just skim coat the walls with joint compound evenly. Sand it smooth and wipe down with a damp sponge or cloth. Then apply the primer-sealer.
How to Activate Prepasted Wallpaper Adhesive
- Cut your strip to size, then roll it up with the pattern inside, starting at the top.
- Fill the bathtub or trough with water.
- Place the rolled strip in the water for as long as the manufacturer suggests. While the strip is still in the water, reroll it to wet any dry adhesive.
- Lift the wallpaper slowly (grabbing it at the top) from the water. Position it in place on the wall while it's still wet.
How to Hang the Bathroom Wallpaper
- Wherever you start hanging your paper, keep in mind when the last strip meets the first, there will be a mismatch. So choose as inconspicuous spot as possible (behind a door is usually good).
- Snap a chalk line where you want to begin. To do this, use a plumb line to get it perfectly vertical. Press the plumb firmly against the wall prior to snapping it.
- Repeat the previous step each time you wallpaper around a corner.
- Cut the first strip with scissors about 4 inches longer than the actual wall height. Activate the paste or apply it if it is not the prepasted kind.
- When you position the strip, allow 2 inches overhang at the top and bottom.
- Remove the air bubbles and smooth it out with a wallpaper brush. Brush toward the ceiling and the baseboard. Wipe with a damp sponge.
- Remove the excess at the top and bottom with the utility knife. Use your broad knife as a guide.
- Do the same steps for the second and subsequent strips, butting them closely together. Avoid overlapping.
- Use a seam roller on the seams. Remove paste or adhesive with a damp sponge.
How to Deal With Corners
- Measure the distance (in three places to be accurate) between the last strip you hung and the corner. Add 1/2 inch.
- Cut a strip lengthwise using this measurement. Position and hang this strip. You should have a partial strip left over.
- Measure the remaining partial strip and subtract 1/2 inch. Make a new plumb line at that distance from the last piece.
- Hang this strip overlapping the corner seam by 1/2 inch. Use the plumb line as a vertical guide. Tip: Prepasted vinyl wallpaper will not stick to itself. To overlap corners, apply vinyl-to-vinyl adhesive on the overlap.
How to Paper Tough Spots
Around towel-bar or sink brackets. If towel-bar brackets are small, paper right over them. While the paper is still wet, cut an X with your utility knife through the paper covering the bracket. Press the paper securely around the bracket and trim the excess. Paper as closely to sink brackets as possible, then trim with a utility knife. If the towel brackets are large, you may find it easier to remove them before papering (note the location of the bracket and any holes for wall fasteners.)
Behind toilet or pedestal sink. Work the paper behind the toilet or sink, using one hand above and the other below. Smooth it out with a small paint roller attached to a long handle. If the space is too tight for the roller, wrap a small towel around a yardstick and smooth the paper horizontally.
Around plumbing fixtures. If there's a fixture collar, slide it back. Paper and trim as close as possible. Use your fingers to smooth out and press the paper into place. Slide the collar back against the wall.
How to Wallpaper Borders
- Mark where you want to apply the border, using a pencil and ruler. Measure accurately. If you feel the room is uneven, use a level.
- Measure the length of one wall and cut a strip off the border to fit. Allow a few inches for trimming.
- If you're using a prepasted border, soak it in water the length of time specified by the manufacturer. If you're using paste, apply it now to the back of the strip. Do not use additional paste on a prepasted border. This could discolor the border and cause it not to adhere as well.
- When the strip is ready to hang, fold it in pleats with the pasted side touching.
- Start in a corner. Allow about 1/2 inch overhang. Smooth with a wallpaper brush.
- The next and subsequent strips may be tricky. Cut them to match the pattern on the previous strip.
- Hang it by overlapping the last strip slightly. Be careful to align the pattern.
- Use a roller on the overlaps and corners to assure proper adhesion.
Popular Articles
Three Places to Spend Money on the Exterior of Your Home
When you have the exterior of your home remodeled, you are investing, time, energy and convenience into the project and you want to make sure that...
88488 Views
When to Use a Brush, Roller or Sponge Brush
Brushes are a good choice for painting trim and woodwork. They are also useful for cutting in the edges around the top and bottom edges and corners...
69974 Views
Homemade Headboards-Make an Upholstered or Wooden Headboard
Homemade headboards can add a lot of personality to any bedroom. They can be coordinated with existing furniture and room decor or they can be the...
69692 Views
Creating a Cottage Kitchen with Bead Board
Kitchen decor can range from modern and bold to elegant and elaborate by using strategic kitchen pieces. One of the most popular decorating trends...
48374 Views
Gas Fireplace Diagnostics and Troubleshooting
Follow these steps for diagnosing and troubleshooting Gas Fireplaces repairs. For the average DIYer, this may seem intimidating, depending on the...
29059 Views
Latest Articles
Understanding Indonesia’s Real Estate Investment Laws for Foreigners
Indonesia, with its stunning landscapes, deep-rooted cultural heritage, and renowned hospitality, has emerged as a top destination for foreigners...
on Jan 25, 2024
Real Estate Development in Asian Cities
In many Asian cities, the rapid pace of urban development has led to the decline of historic districts, areas once teeming with cultural richness...
on Jan 25, 2024
Shower Envy: Elevating Your Bathroom with a Stunning Walk-In Shower
Are you tired of the same old routine in your bathroom? It might be time to consider a change, and one way to elevate your bathroom to a new level...
on Jan 22, 2024
Exploring Crowdfunding as an Innovative Approach to Real Estate Investment
The landscape of property selling has been transformed significantly due to the advent of property crowdfunding. This innovative approach,...
on Jan 10, 2024
The Rise of Co-Living Spaces in Asian Cities
Asia, home to 21 of the worlds 30 largest cities, is a significant player in the global economy, contributing 38% of the goods and services of the...
on Jan 5, 2024
Featured Articles
What Type of Licensed Contractor Should You Hire?
on Feb 28, 2017
Hire Contractors / Estimates

Looking for a specialty project? There are many types of contractors available for your home improvement needs. Finding the right type of...
Actions
Top Categories
- Garden / Landscaping / Patio — 263
- Kitchen / Bathrooms — 240
- Real Estate / Finance — 200
- Appliance / Repair — 186
- Interior Design / Decor — 184
- HVAC / Air Conditioning — 147
- Cleaning / Maintenance — 144
- Improvements / Remodeling — 131
- Plumbing / Basements — 118
- Floors / Tile / Hardwood — 115
- Doors / Garages — 113
- Safety / Security — 112
Articles Archive
More DIY Articles
Digital Calipers : How to Avoid the Value Disordering?
A lot of users complain that the digital calipers are not durable, and may break down for only several days. It is broken since digital calipers...
Use a Budget Calculator When Considering a Property Purchase
Purchasing a house is probably the biggest investment that most people will make in their lives. It is a major step and in many cases will lead the...
What Is a Laser Cutter Used for in Home Improvement Project
When it comes to valuable home improvement tools, a laser cutter may not come to everyones mind. In fact, laser cutting has become a very common...
Bathroom Sink Buying Guide
Bathroom sinks may not be as obvious as their kitchen counterparts, but that does not make them any less important. In fact, it can be argued that...
Tangerine Tango: How to Decorate with This Vibrant Color
Decorating with color can be tricky, and working with bright, bold colors can feel especially daunting. The color-powerhouse Pantone Color...