The Storage Shed You Build Yourself
by Guest on Sep 8, 2015
The marketplace is full of prefab and prebuilt storage sheds. Some companies come to your property and build a shed on-site in a variety of sizes. Others will bring them in on a flat-bed. Prefab buildings vary in quality depending on price and materials. They come in metals or plastics as well as traditional wood. Even with all these options, DIY is still the best, most cost-effective choice for shed building. Building yourself allows you to choose your materials and construction methods. Below are the steps for building your shed.
Step 1: Choose Your Site
You will want to put your shed in a fairly flat place. It doesn't have to be completely level, but you don't want to have to compensate for a steep hill when you are building your foundation. The flatter you can make your site, the better.
Step 2: Choose Your Plans or Kit.
Precut kits take some of the difficult work away. You will get several ready to erect parts. All you need is a hammer or electric screwdriver. The downside is that you are limited to the kit designs and the materials choices are limited to what is in the kit.
Shed plans usually provide you with a list of materials you will need to bring home and cut yourself. Don't deviate too much on the structural parts or you will risk losing structural stability, but otherwise, you are free to choose the flooring and siding that you want.
Both plans and kits usually contain good instructions for how to build a garden shed. You may find kits available online, but it's usually more cost-effective to buy them locally. Online you can find a great variety of free and for purchase shed plans.
Step 3: Choose Your Materials
Even if you decided to use a shed kit, you will need to buy roofing materials and concrete. Buy any screws or nails you think you will need. If you are building from plans, bring them with you while you choose the wood for your wall studs, floor, and siding as well as fasteners that your plans call for.
Step 4: Build the foundation.
The best way is to pour a self-leveling concrete pad though many plans call for a block foundation. A concrete pad is fairly cost-effective and eliminates the need to install a separate subfloor. Concrete floors are easy to keep clean and are best for garage sheds or American barns. Make sure to install lags in the concrete while it is still soft so you can secure wall frame using lag bolts.
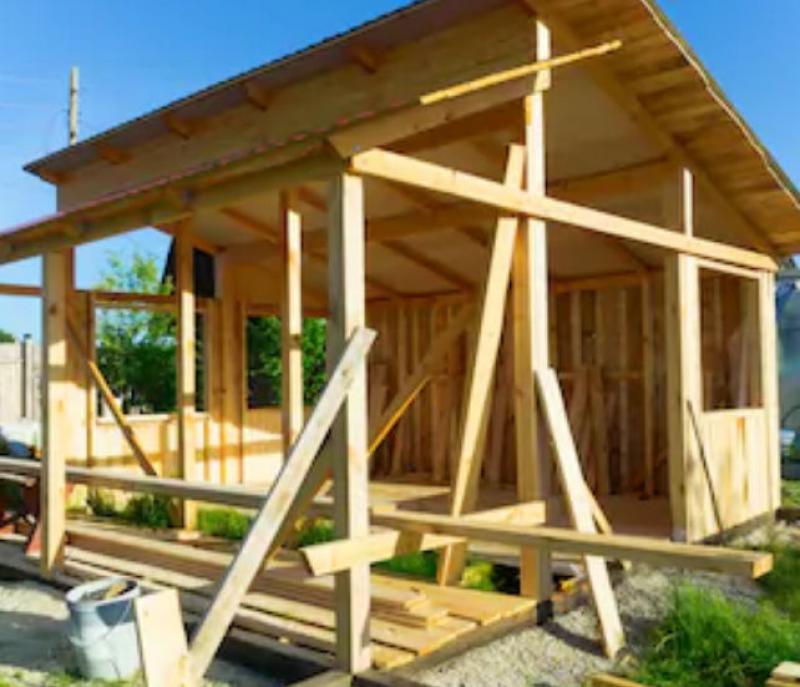
Step 5: Frame Your Walls
Studs should be roughly 16 to 24 inches apart, depending on the size of your shed. A smaller shed can use studs that are further apart. A larger one needs more support than that. Secure the studs to the boards using the "toe-nailing" technique. The bottom board of your wall frame attaches to the concrete lags with bolts. You will want to predrill for the lag bolts. Frame in any doors or windows in this step.
Step 6: Sheathing or Siding
Add sheathing or siding to the outside. If your plans or kits using an OSB backed siding, it's not necessary to use separate sheathing. If you are using vinyl siding or some other outer finish, you should use sheathing on your wall studs.
Step 7: Roofing
Create your roof joists, typically constructed triangles, then secure them in place. Secure sheathing to them, then apply tar paper and shingles or roofing tin.
Step 8: Hang Doors and Windows
Add your doors to the front. Garage doors usually have their separate instructions, but you might use barn doors instead. Take care to make sure they are level and swing open properly.
Storage sheds come in prefab or site=built options, but they truly shine when you choose to build them yourself. Use a kit to avoid having to cut a lot of heavy pieces of wood or buy extra tools. If you're truly intrepid, find plans and make all the material choices yourself. Either way, your garden shed, garage sheds or American barns will be uniquely yours because you built it.
Popular Articles
Three Places to Spend Money on the Exterior of Your Home
When you have the exterior of your home remodeled, you are investing, time, energy and convenience into the project and you want to make sure that...
108470 Views
Homemade Headboards-Make an Upholstered or Wooden Headboard
Homemade headboards can add a lot of personality to any bedroom. They can be coordinated with existing furniture and room decor or they can be the...
81314 Views
When to Use a Brush, Roller or Sponge Brush
Brushes are a good choice for painting trim and woodwork. They are also useful for cutting in the edges around the top and bottom edges and corners...
74238 Views
Creating a Cottage Kitchen with Bead Board
Kitchen decor can range from modern and bold to elegant and elaborate by using strategic kitchen pieces. One of the most popular decorating trends...
59675 Views
Gas Fireplace Diagnostics and Troubleshooting
Follow these steps for diagnosing and troubleshooting Gas Fireplaces repairs. For the average DIYer, this may seem intimidating, depending on the...
36548 Views
Latest Articles
Signs You Need Professional Plumbing Repair: Don’t Ignore These Warning Signs
Ignoring the signs of a pending plumbing disaster can lead to significant damage and costly repairs. For instance, homeowners might not realize...
on Jan 20, 2026
Beneath the Surface: Why Professional Trenchless Sewer Line Repair
Beneath the Surface: Why Professional Trenchless Sewer Line Repair is Essential for Modern Homeowners
on Jan 14, 2026
Hydro Jetting Services: Unclog Your Pipes with the Power of Water
When faced with stubborn clogs and slow drains, conventional solutions often fall short. But with the innovation of hydro jetting services,...
on Dec 15, 2025
Why Professional Heat Pump Installation is Key to Maximizing Efficiency and Longevity
Heat pumps are a highly efficient means of heating and cooling homes, reducing energy costs and contributing to environmental sustainability. To...
on Dec 15, 2025
Why Professional Boiler Repair is Essential for Home Safety and Comfort
Maintaining a warm and safe home environment is paramount for any homeowner. Your home's boiler system plays a critical role in this, but what...
on Nov 5, 2025
Featured Articles
What Type of Licensed Contractor Should You Hire?
on Feb 28, 2017
Hire Contractors / Estimates

Looking for a specialty project? There are many types of contractors available for your home improvement needs. Finding the right type of...
Actions
Top Categories
- Garden / Landscaping / Patio — 264
- Kitchen / Bathrooms — 240
- Real Estate / Finance — 203
- Appliance / Repair — 186
- Interior Design / Decor — 184
- HVAC / Air Conditioning — 150
- Cleaning / Maintenance — 144
- Improvements / Remodeling — 131
- Plumbing / Basements — 121
- Floors / Tile / Hardwood — 116
- Safety / Security — 114
- Doors / Garages — 113
Articles Archive
More DIY Articles
Preparing Yourself for Major Home Renovation Projects
Remodeling any part of your home can be exciting. It will increase property value and for many homeowners, the project is a great DIY challenge...
How to Maintain the Lint Filter on a Clothes Dryer
Running a household is a major responsibility, and to bear that responsibility you need to learn many new skills and talents. Beyond issues...
Why Is My Well Pump Short Cycling?
Your well pump is an essential piece of kit that is often overlooked until something goes wrong with it. Unless you want to draw water by hand you...
Top 5 Things to Check when Hiring a Stucco Contractor
Stucco is easy to maintain, durable, and long-lasting; but all of this is possible only if the right stucco contractor is hired. So, in regards to...
Emergency Water Damage
A home or office could be flooded due to a natural calamity or a major plumbing leak. The speed at which water fills up the space is unimaginable...