How to Remove and Replace Broken Ceramic Tiles
by Jessica Ackerman on Apr 28, 2012
Tips to Achieve Professional Looking Results
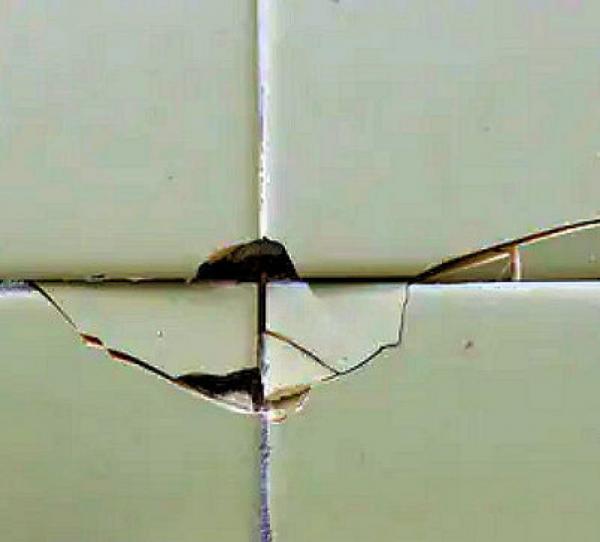
Ceramic tile flooring has been popular for years, and its popularity continues to grow. Not only is ceramic tile flooring stylish and attractive, but it is also sturdy, easy to clean, and with proper care, it can last for decades. Unfortunately, ceramic tile floors are not indestructible. If something heavy is dropped, the tiles can crack or break and detract from the overall look of the room. Not only are cracked or broken ceramic tiles unattractive, but they can also cause damage to the sub-flooring beneath. Moisture from wet boots and shoes can seep into the cracks and cause mold, mildew, and ultimately rot the wood beneath.
Fortunately, it is possible to remove a single ceramic floor tile and replace it without damaging the surrounding tiles. When taking the time to properly remove a broken floor tile, if extras were saved, more than likely the repair will be virtually invisible. No one will ever know one of the tiles was broken and replaced, and the ceramic tile flooring will provide many more years of beauty and practical use.
Necessary Supplies
Hopefully, when the ceramic flooring was originally installed, a few extra tiles were kept. If not, search online or in home improvement stores for a ceramic tile that matches the existing flooring. It might take a little perseverance to find the right flooring, but chances are you will find a close match. Even if the tile you find is not a perfect match, a ceramic floor tile that is a little off-color is far better than keeping the old one that is broken or cracked.
Besides a replacement, you will require a rotary cutting tool, a cold chisel, a small sledgehammer, and a wood chisel. You should also have a patching compound on hand in case the sub-floor is gouged, ceramic mastic, a notched spreader, grout to match the existing color and type, a damp sponge, a soft dry cloth, and grout sealer.
Procedure
Begin by carefully cutting away the grout around the cracked or broken ceramic tile. It is important to take your time and proceed with caution to avoid cracking or chipping surrounding tiles. Once the grout has been cut away, use a cold chisel and a small sledgehammer or a rotary tool and cutting attachment to create an X on the surface. Carefully chisel the ceramic tile into small pieces that can easily be removed. Chisel away any remaining mastic and grout using a wood chisel while being careful not to gouge the floor beneath. After all of the grout and old mastic have been chiseled away, sweep up any remaining dust and debris in preparation to replace the old tile.
Lastly, apply mastic to the back of the new tile, and place it squarely in the opening. Allow the mastic to dry completely according to product label instructions. After it dries and the new tile is firmly in place, fill in the gaps with matching grout. The grout will take approximately 15 minutes to set to the touch. Once it is set, wipe away any excess grout with a damp sponge using oblique strokes. Rinse the sponge as often as necessary, and allow the grout to dry completely. After the new grout is completely dry the new tile can be cleaned and buffed with a soft cloth. Be sure to seal the grout according to product label recommendations.
After replacing the cracked or broken ceramic tile, the entire floor will look like new. Replace any broken or cracked ceramic tiles instead of investing in new flooring. It is easier than most people realize, and although it takes time and effort to remove and replace broken or cracked ceramic tiles, it is possible to give ceramic tile floors a much needed facelift - all for the price of mastic, grout, and a new tile to matching old flooring.
Popular Articles
Three Places to Spend Money on the Exterior of Your Home
When you have the exterior of your home remodeled, you are investing, time, energy and convenience into the project and you want to make sure that...
108100 Views
Homemade Headboards-Make an Upholstered or Wooden Headboard
Homemade headboards can add a lot of personality to any bedroom. They can be coordinated with existing furniture and room decor or they can be the...
81211 Views
When to Use a Brush, Roller or Sponge Brush
Brushes are a good choice for painting trim and woodwork. They are also useful for cutting in the edges around the top and bottom edges and corners...
73750 Views
Creating a Cottage Kitchen with Bead Board
Kitchen decor can range from modern and bold to elegant and elaborate by using strategic kitchen pieces. One of the most popular decorating trends...
59584 Views
Gas Fireplace Diagnostics and Troubleshooting
Follow these steps for diagnosing and troubleshooting Gas Fireplaces repairs. For the average DIYer, this may seem intimidating, depending on the...
36478 Views
Latest Articles
Signs You Need Professional Plumbing Repair: Don’t Ignore These Warning Signs
Ignoring the signs of a pending plumbing disaster can lead to significant damage and costly repairs. For instance, homeowners might not realize...
on Jan 20, 2026
Beneath the Surface: Why Professional Trenchless Sewer Line Repair
Beneath the Surface: Why Professional Trenchless Sewer Line Repair is Essential for Modern Homeowners
on Jan 14, 2026
Hydro Jetting Services: Unclog Your Pipes with the Power of Water
When faced with stubborn clogs and slow drains, conventional solutions often fall short. But with the innovation of hydro jetting services,...
on Dec 15, 2025
Why Professional Heat Pump Installation is Key to Maximizing Efficiency and Longevity
Heat pumps are a highly efficient means of heating and cooling homes, reducing energy costs and contributing to environmental sustainability. To...
on Dec 15, 2025
Why Professional Boiler Repair is Essential for Home Safety and Comfort
Maintaining a warm and safe home environment is paramount for any homeowner. Your home's boiler system plays a critical role in this, but what...
on Nov 5, 2025
Featured Articles
What Type of Licensed Contractor Should You Hire?
on Feb 28, 2017
Hire Contractors / Estimates

Looking for a specialty project? There are many types of contractors available for your home improvement needs. Finding the right type of...
Actions
Top Categories
- Garden / Landscaping / Patio — 264
- Kitchen / Bathrooms — 240
- Real Estate / Finance — 203
- Appliance / Repair — 186
- Interior Design / Decor — 184
- HVAC / Air Conditioning — 150
- Cleaning / Maintenance — 144
- Improvements / Remodeling — 131
- Plumbing / Basements — 121
- Floors / Tile / Hardwood — 116
- Safety / Security — 114
- Doors / Garages — 113
Articles Archive
More DIY Articles
5 Tips to Choose the Right Tile for Your Bathroom
Choosing the tiles you’re going to put into your bathroom renovation is one of the most important decisions you’re going to make. The tile is...
Tips for Carpet and Rug Cleaning when Living with Teenagers
Carpets and rugs are essential additions to the floor and homeowners are constantly looking for the best styles and designs to complement their...
Installing a Water Saving Shower Head
Water conservation is becoming a major issue, particularly in drought-affected areas. Many cities are urging residents to water lawns less...
Home Sweet Home: Your Pre-Move-In Checklist
Now that you have your new house, there is no doubt that you will be eager to move in right away. The sooner you can unpack and organize, the...
All About Valves
Valves are an indispensable part of any modern building. By opening and closing, they can control the flow of air, water, or some other liquid...