How to Install a Programmable Thermostat
by Guest Post on Dec 13, 2011
Do It Yourself or Hire a Pro for your New Digital Thermostat
If you hire a professional, they will charge you $100-$125 to remove your old thermostat and install a new one. You can cut your costs in half or more with a little electric know-how and a couple of hours.
Be sure to write down the number and wire type that is attached to your old thermostat. If it is connected to thin wires coming directly out of the wall, then they are low voltage and do not present a shock hazard. If the thermostat is connected to an electrical box, it is likely running off a 120-volt current and you should contact a licensed electrician.
Step by Step Installing a New Digital Thermostat
1. Turn the power off.
Turn off the power to the furnace and central air conditioner unit by shutting off the circuit breaker or removing the fuse at the service panel.
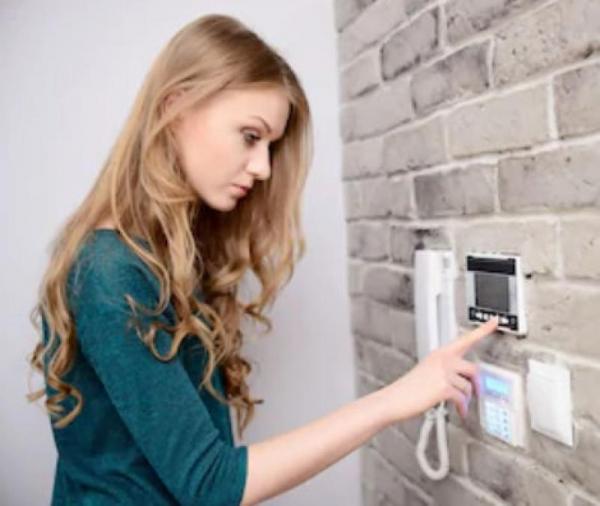
2. Remove the old thermostat cover.
Without disconnecting any wires, remove the thermostat cover from the mounting plate (see image above).
3. Remove the mounting plate.
Unscrew and remove the old thermostat's mounting plate from the wall.
4. Label the existing wires.
The old thermostat will have a letter identifying each wire. Attach a label (included with your new thermostat) to each wire that corresponds to the letter on the old thermostat. If no labels are provided, use masking tape (see image, left).
5. Disconnect the wires.
Once the wires are marked, disconnect them from the screw terminals. To keep the wires from falling back into the wall, wrap them around a pencil. If you discover an old paint color behind the mounting plate, make sure that the new thermostat will cover up the mismatched paint. If it doesn't, repaint the wall before you install the new thermostat.
6. Prep the thermostat base.
Thread the wires through the base of the new thermostat. Be sure that the base sits flush against the wall and that none of the wires are trapped behind it. Place a torpedo level on top of the base and adjust the base until it's perfectly level. Use a sharp pencil to mark the center of the mounting plate's screw holes.
7. Drill the mounting holes.
Remove the base and drill a 3/16-inch-diameter hole at each screw location.
When you drill holes to mount the new thermostat, hold a vacuum cleaner hose up against the wall to catch the drywall dust.
8. Attach the base to the wall.
Use a hammer to gently tap plastic anchors into the holes. Reposition the thermostat over the anchors. Thread the wires through the base of the new thermostat and insert the mounting screws (see image, left).
9. Level the base and tighten it to the wall.
Use the torpedo level again to ensure that the base is still level. Once level, tighten the mounting screws.
10. Connect the wires.
If necessary, use a wire stripper to remove about 1/4 inch of plastic insulation from the ends of the wires. Connect the wires to the screw terminals, matching the masking-tape labels to the letters on the terminals. Also, consult the wiring diagram in the installation manual to make sure everything is properly hooked up.
11. Turn on the power.
Turn the electricity back on, then follow the thermostat's manual to program the unit. Finally, run a test in both the auto and manual modes to confirm that the furnace and air conditioner go on and off, as directed by the thermostat settings.
Hiring a professional may find it too small of a job to install one thermostat, however, if you call around you should be able to find someone. You can always stock-pile your small electrical jobs into a larger one for a pro to take care of too.
Popular Articles
Three Places to Spend Money on the Exterior of Your Home
When you have the exterior of your home remodeled, you are investing, time, energy and convenience into the project and you want to make sure that...
108184 Views
Homemade Headboards-Make an Upholstered or Wooden Headboard
Homemade headboards can add a lot of personality to any bedroom. They can be coordinated with existing furniture and room decor or they can be the...
81238 Views
When to Use a Brush, Roller or Sponge Brush
Brushes are a good choice for painting trim and woodwork. They are also useful for cutting in the edges around the top and bottom edges and corners...
73772 Views
Creating a Cottage Kitchen with Bead Board
Kitchen decor can range from modern and bold to elegant and elaborate by using strategic kitchen pieces. One of the most popular decorating trends...
59610 Views
Gas Fireplace Diagnostics and Troubleshooting
Follow these steps for diagnosing and troubleshooting Gas Fireplaces repairs. For the average DIYer, this may seem intimidating, depending on the...
36497 Views
Latest Articles
Signs You Need Professional Plumbing Repair: Don’t Ignore These Warning Signs
Ignoring the signs of a pending plumbing disaster can lead to significant damage and costly repairs. For instance, homeowners might not realize...
on Jan 20, 2026
Beneath the Surface: Why Professional Trenchless Sewer Line Repair
Beneath the Surface: Why Professional Trenchless Sewer Line Repair is Essential for Modern Homeowners
on Jan 14, 2026
Hydro Jetting Services: Unclog Your Pipes with the Power of Water
When faced with stubborn clogs and slow drains, conventional solutions often fall short. But with the innovation of hydro jetting services,...
on Dec 15, 2025
Why Professional Heat Pump Installation is Key to Maximizing Efficiency and Longevity
Heat pumps are a highly efficient means of heating and cooling homes, reducing energy costs and contributing to environmental sustainability. To...
on Dec 15, 2025
Why Professional Boiler Repair is Essential for Home Safety and Comfort
Maintaining a warm and safe home environment is paramount for any homeowner. Your home's boiler system plays a critical role in this, but what...
on Nov 5, 2025
Featured Articles
What Type of Licensed Contractor Should You Hire?
on Feb 28, 2017
Hire Contractors / Estimates

Looking for a specialty project? There are many types of contractors available for your home improvement needs. Finding the right type of...
Actions
Top Categories
- Garden / Landscaping / Patio — 264
- Kitchen / Bathrooms — 240
- Real Estate / Finance — 203
- Appliance / Repair — 186
- Interior Design / Decor — 184
- HVAC / Air Conditioning — 150
- Cleaning / Maintenance — 144
- Improvements / Remodeling — 131
- Plumbing / Basements — 121
- Floors / Tile / Hardwood — 116
- Safety / Security — 114
- Doors / Garages — 113
Articles Archive
More DIY Articles
Garage Door Complete Buying Guide
If your garage door has finally gotten to the point where you need to replace it, you may be finding that trying to sift through the incredible...
The Best 7 Upgrades You Can Make to Your Kitchen
Upgrading your kitchen is one of the best decisions you can make for your home. This is because not only is it a room that you spend a lot of time...
Five Ways to Spruce up Your Deck
Although the deck has the potential to function as additional square footage to a home, it is all too often neglected or used as a catch-all for...
5 Basic Home Improvement Tasks You Can Do Yourself
Are you stuck at home during COVID-19? Is money running low but you still have home improvement tasks that need to be done? Fear not, as with the...
How to Prolong the Life of Your Roof
One thing is for sure; the average homeowner probably does not spend too much time thinking about their roof on a day-to-day basis. In fact, I am...