How to Install a Bathroom Vanity
by Alex Cordier on Apr 4, 2017
Bathroom vanities are the focal point of many bathroom designs so it is important to get the installation right. Installing bathroom vanities yourself isn’t as difficult as it sounds. Anyone with competent DIY skills, focus and a high attention to detail can easily get the job done. First, it’s important to choose a style that fits the overall design of your bathroom. From multi-layered wooden bathroom vanities to simple and small bathroom vanities, there many flexible styles out there that can suit your needs.
To install a wall hung vanity in your bathroom you will need to collect all the necessary tools and protective equipment. Installations of bathroom vanities typically require the use of a hammer drill, a screwdriver, screws, a knife, measuring tape, a pencil, a wall plug, a cordless drill, and a hole saw. It’s important to wear safety equipment like safety glasses, appropriate gloves, and noise-canceling headphones to protect yourself during the process.
Once you have equipment sorted, you can start the process of installing your wall hung vanity. Bathroom vanities can be installed in three main steps which we will guide you through below. You will learn where to position the vanity, how to secure it to the wall and how to cut holes for the plumbing work with a hole saw.
Step 1. Measure Where Your Bathroom Vanity Will Fit
The first thing you need to do is measure the vanity outline. It’s important to be as accurate as possible when measuring spaces for bathroom vanities. Incorrect measurements can mess up the whole process. Using a pencil and measuring tape, make a mark on the floor where you want your vanity to sit. Figure out the location of your waste and water pipes. Measure from the edge of where the vanity will sit to the centre of each pipe. Then, work out the measurements from the back wall to the middle of the pipes in order to see how far across and how far from the walls the pipes can fit.
Step 2. Cut Access Holes in the Vanity for Plumbing Work
Once you have measurements worked out and marked down, the next step is to cut access holes in the vanity for the bathroom taps pipes to fit through. First, remove the back panel from the vanity cabinet. This will make the process a little easier. Then, move your pipe measurements to the base panel and using a hole saw, cut the holes for the pipes. Make sure the center of the drill aims right at the middle of your markings. It’s also important that your hole saw is bigger than the pipes so when you slide the vanity over the top, it fits easily. Once you have cut the holes, replace the back panel, and put the bathroom vanity over the top of the pipes.
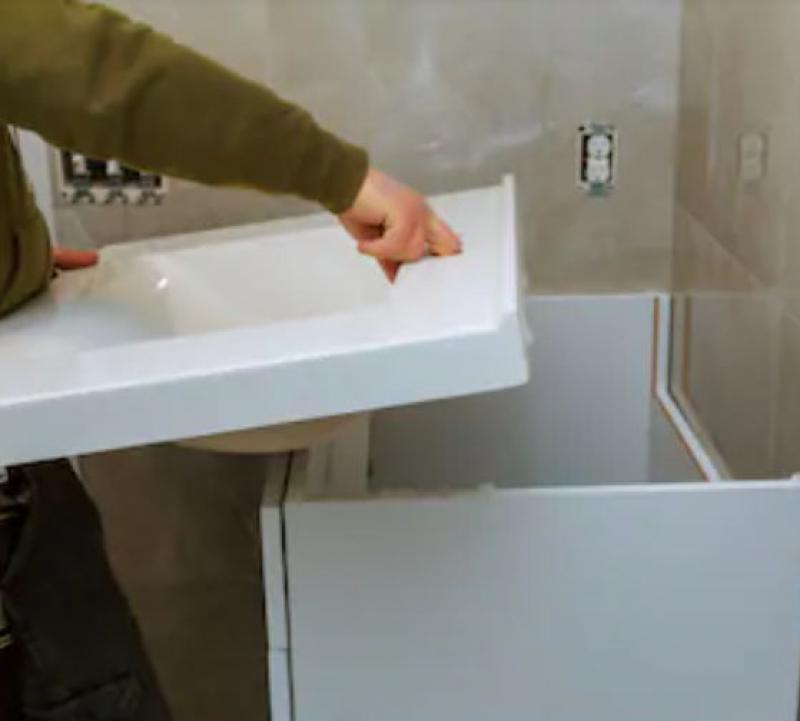
Step 3. Install the Bathroom Vanity
Now the tricky part begins. Before you begin the installation, make sure to check that the bathroom vanity is level. Then, using a hammer drill, carefully put two screw holes through the cabinet’s back rail and into the wall. Push wall plugs into the holes, cut them to length using a knife, and put screws through the cabinet into the wall. Check once again that your vanity is still level. Now all that is left to do is put your draws, benchtop, doors, and sink into place. Once this is all done, you are ready to call the plumber.
Popular Articles
Three Places to Spend Money on the Exterior of Your Home
When you have the exterior of your home remodeled, you are investing, time, energy and convenience into the project and you want to make sure that...
108281 Views
Homemade Headboards-Make an Upholstered or Wooden Headboard
Homemade headboards can add a lot of personality to any bedroom. They can be coordinated with existing furniture and room decor or they can be the...
81258 Views
When to Use a Brush, Roller or Sponge Brush
Brushes are a good choice for painting trim and woodwork. They are also useful for cutting in the edges around the top and bottom edges and corners...
74198 Views
Creating a Cottage Kitchen with Bead Board
Kitchen decor can range from modern and bold to elegant and elaborate by using strategic kitchen pieces. One of the most popular decorating trends...
59630 Views
Gas Fireplace Diagnostics and Troubleshooting
Follow these steps for diagnosing and troubleshooting Gas Fireplaces repairs. For the average DIYer, this may seem intimidating, depending on the...
36511 Views
Latest Articles
Signs You Need Professional Plumbing Repair: Don’t Ignore These Warning Signs
Ignoring the signs of a pending plumbing disaster can lead to significant damage and costly repairs. For instance, homeowners might not realize...
on Jan 20, 2026
Beneath the Surface: Why Professional Trenchless Sewer Line Repair
Beneath the Surface: Why Professional Trenchless Sewer Line Repair is Essential for Modern Homeowners
on Jan 14, 2026
Hydro Jetting Services: Unclog Your Pipes with the Power of Water
When faced with stubborn clogs and slow drains, conventional solutions often fall short. But with the innovation of hydro jetting services,...
on Dec 15, 2025
Why Professional Heat Pump Installation is Key to Maximizing Efficiency and Longevity
Heat pumps are a highly efficient means of heating and cooling homes, reducing energy costs and contributing to environmental sustainability. To...
on Dec 15, 2025
Why Professional Boiler Repair is Essential for Home Safety and Comfort
Maintaining a warm and safe home environment is paramount for any homeowner. Your home's boiler system plays a critical role in this, but what...
on Nov 5, 2025
Featured Articles
What Type of Licensed Contractor Should You Hire?
on Feb 28, 2017
Hire Contractors / Estimates

Looking for a specialty project? There are many types of contractors available for your home improvement needs. Finding the right type of...
Actions
Top Categories
- Garden / Landscaping / Patio — 264
- Kitchen / Bathrooms — 240
- Real Estate / Finance — 203
- Appliance / Repair — 186
- Interior Design / Decor — 184
- HVAC / Air Conditioning — 150
- Cleaning / Maintenance — 144
- Improvements / Remodeling — 131
- Plumbing / Basements — 121
- Floors / Tile / Hardwood — 116
- Safety / Security — 114
- Doors / Garages — 113
Articles Archive
More DIY Articles
The Advantages of Artificial Grass
There are a large number of benefits to installing artificial grass of which the reasons for installing are varied. Obviously, you don't need to...
Repairing Wall Switches
Sometimes a light fixture that is in perfect operating condition does not work because the wall switch to the receptacle is faulty. There are...
Types of Weather Stripping
Choosing a type of weatherstripping includes consideration of friction, weather, temperature changes, and wear and tear associated with its...
4 Ways to Make Your Bathroom Feel Bigger
Every bathroom needs to have the basics such as the toilet, a sink and faucet, and a shower area. Regardless of how small the space allocated for...
Should You Let Furnished or Unfurnished?
If you’re a landlord, or you’re thinking about investing in property either for a living or to supplement your other income, you’re going to have...