How to Install Pavers
by Guest Post on Sep 17, 2014
When installing pavers you want to get it right the first time, otherwise, you’ll end up having to make repairs after a few years.
You want to make sure you or your contractor is using the right materials. There are ways to cut corners when installing pavers, especially to the untrained eye. If you’re doing the installation yourself it’s better to spend a couple of extra bucks so you don’t have to redo your work down the road.
Supplies Needed to Install Pavers:
- Pavers – approximately $3.00 + tax per square foot
- ¾ Road Stone – $20.00 per ton
- Concrete Sand – $35 per ton
- Edging Restraint – $12.00 per 10-foot length
- Polymeric Sand – $20.00 per bag
Tools
- Shovel or Excavator
- Plate Compactor
- Laser Level
- Cutoff Saw with a Water Attachment
- Garden Hose
- Spray Paint for Marking
First outline where you want to install your new paver patio, walkway, or driveway. Using spray paint or any other marking material, measure and outline the area where you’re installing the pavers.
Once you have outlined the area the next step is to excavate. You want to make sure you dig deep enough to lay a solid foundation. Without creating the proper foundation your pavers will shift, raise, or sink within a few seasons. Depth will always depend on the type of installation you are doing. For all projects, you want to excavate an additional foot on each side of the installation to provide a wide and sturdy base.
Tip: If you are hiring a contractor to be sure to ask them how much they excavate. Sometimes, contractors will try to save money by only digging an inch or two.
Excavation Depths for Paver Installations:
Depending on your soil conditions you may choose to excavate an additional inch or two. If your soil is mostly clay add 2 inches for any type of installation.
Now that you have excavated you can begin to lay the foundation down. We use ¾ inch road stone because of its durability. When laying the road stone, leave about an inch of depth for the concrete sand.
After the road stone is laid using a plate compactor to level the foundation and make sure it is packed tightly. It’s very important to thoroughly compact the area to create a solid foundation that will last a lifetime. We use a Bomag 6500 cfm laboratory plate compactor. We recommend only compacting up to 8 inches of foundation at a time. For bigger projects like installing a driveway, we recommend laying half of the stone, compacting it, laying the remaining road stone, and compacting it again.
Tip: Another way some contractors try to save money is by using recycled crushed concrete for foundation instead of road stone. Crushed concrete only costs $5 per ton, but will deteriorate over time and will cause pavers to shift, sink, or rise.
Your next step is to lay the concrete sand filling in the last inch of depth. To set your grade use a laser level and the compactor to smooth over the area leaving a gentle slope away from your home. By doing so water won’t pool in the middle of the patio or run off towards your house.
Tip: Another way certain contractors can cut costs is by using an alternative to concrete sand called “dust.” Dust costs $8 a ton compared to $35 for concrete sand. However, over time “dust” will eat away the base of your pavers causing severe deterioration of your walkway, driveway, or patio.
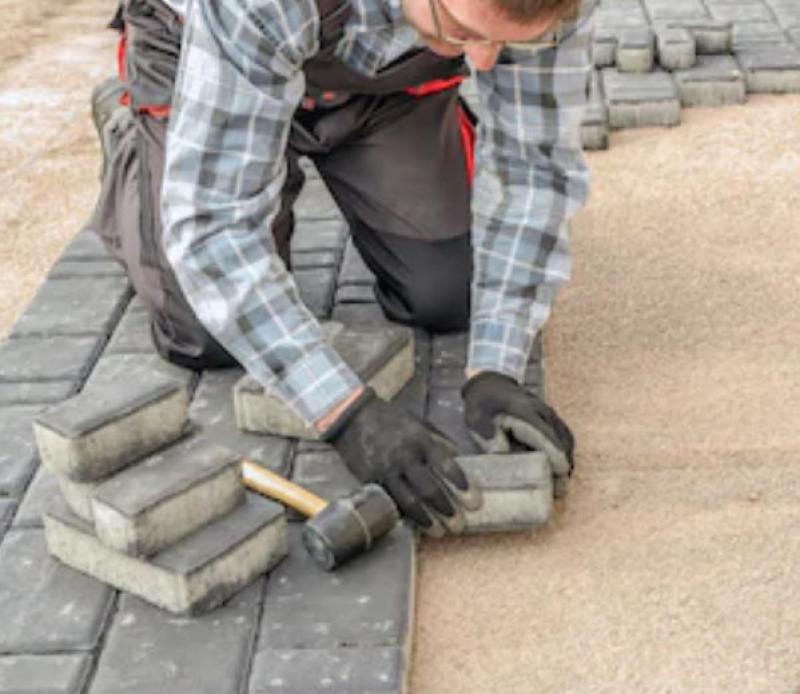
Now that you’ve got the foundation in place begin installing pavers by starting with the border. Then, lay down the inside pavers in the desired pattern leaving 1/16” to 1/8” gap between each paver.
Depending on the shape or pattern of your paver installation you might need to cut some of the pavers. When you begin to cut your pavers, use a cutoff saw with a water attachment. We use a Stihl TS420 cutoff saw with a water attachment. In many states including New Jersey, it’s illegal to cut pavers without using water because of how much dust it generates. Make sure you wear proper eye protection and a breathing mask to keep the particles out of your eyes and mouth.
For any of the pavers you cut, you’ll need to wash and scrub off the concrete slurry. Afterward, wash the remaining pavers with your hose. Make sure you don’t use to much water and keeping it a low pressure so you don’t deteriorate the foundation.
After all the pavers are in position it’s time to lay the edging restraint. Make sure the edging is secure and snug against the pavers to prevent shifting.
Tip: Some contractors will opt to use concrete to seal the edges because it only costs $3 per bag versus $12 per length of standard edging restraint. By cutting costs and using concrete, you are prone to deterioration and will only last a few seasons. Using a high quality edging restraint will ensure your pavers hold up for many years.
Once the edging restraints are set, spread the polymeric sand over the pavers. Use a broom to sweep the sand into position filling in the spaces between each paver.
Afterward, clean all remaining debris and begin to enjoy your new paver walkway. You may want to plan for a removal service to remove the extra dirt or debris from the excavation and installation. Every 100 square feet of excavation usually produces between 3 and 5 cubic yards of dirt (varies for depth).
Using the right materials may cost a few extra dollars now, but will save you thousands down the road. If you are selecting a contractor make sure you ask them the appropriate questions so you know they aren’t cutting corners when they are installing your pavers. We have seen so many failed paver installations over the years and 90% of the time it was due to the wrong materials being used or not digging a proper foundation.
Popular Articles
Three Places to Spend Money on the Exterior of Your Home
When you have the exterior of your home remodeled, you are investing, time, energy and convenience into the project and you want to make sure that...
108389 Views
Homemade Headboards-Make an Upholstered or Wooden Headboard
Homemade headboards can add a lot of personality to any bedroom. They can be coordinated with existing furniture and room decor or they can be the...
81287 Views
When to Use a Brush, Roller or Sponge Brush
Brushes are a good choice for painting trim and woodwork. They are also useful for cutting in the edges around the top and bottom edges and corners...
74220 Views
Creating a Cottage Kitchen with Bead Board
Kitchen decor can range from modern and bold to elegant and elaborate by using strategic kitchen pieces. One of the most popular decorating trends...
59655 Views
Gas Fireplace Diagnostics and Troubleshooting
Follow these steps for diagnosing and troubleshooting Gas Fireplaces repairs. For the average DIYer, this may seem intimidating, depending on the...
36531 Views
Latest Articles
Signs You Need Professional Plumbing Repair: Don’t Ignore These Warning Signs
Ignoring the signs of a pending plumbing disaster can lead to significant damage and costly repairs. For instance, homeowners might not realize...
on Jan 20, 2026
Beneath the Surface: Why Professional Trenchless Sewer Line Repair
Beneath the Surface: Why Professional Trenchless Sewer Line Repair is Essential for Modern Homeowners
on Jan 14, 2026
Hydro Jetting Services: Unclog Your Pipes with the Power of Water
When faced with stubborn clogs and slow drains, conventional solutions often fall short. But with the innovation of hydro jetting services,...
on Dec 15, 2025
Why Professional Heat Pump Installation is Key to Maximizing Efficiency and Longevity
Heat pumps are a highly efficient means of heating and cooling homes, reducing energy costs and contributing to environmental sustainability. To...
on Dec 15, 2025
Why Professional Boiler Repair is Essential for Home Safety and Comfort
Maintaining a warm and safe home environment is paramount for any homeowner. Your home's boiler system plays a critical role in this, but what...
on Nov 5, 2025
Featured Articles
What Type of Licensed Contractor Should You Hire?
on Feb 28, 2017
Hire Contractors / Estimates

Looking for a specialty project? There are many types of contractors available for your home improvement needs. Finding the right type of...
Actions
Top Categories
- Garden / Landscaping / Patio — 264
- Kitchen / Bathrooms — 240
- Real Estate / Finance — 203
- Appliance / Repair — 186
- Interior Design / Decor — 184
- HVAC / Air Conditioning — 150
- Cleaning / Maintenance — 144
- Improvements / Remodeling — 131
- Plumbing / Basements — 121
- Floors / Tile / Hardwood — 116
- Safety / Security — 114
- Doors / Garages — 113
Articles Archive
More DIY Articles
Choosing a Skilled Plumber to Fix Your Problem
Owning a home is something that every person dreams of. The people who are lucky enough to have this dream come true will have a lot of...
How to Take Care of Your Wood Garage Doors
Whether or not you own garage doors, you probably know that wood is one of the most elegant but also hard to maintain materials. There is no...
9 Amazing Design Tips and Techniques for Starting a Small Garden
It is hard to enjoy anything fresh or natural when you live in the city. The smoke rising in the morning at the nearby factory on the commute to...
Guide to Buying a Hot Tub
A hot tub was considered an extravagance not many years ago. But now many homes have installed them and though it is a luxury addition, it is one...
Choosing a Shade Sail for Your Outdoor Space
Shade sails are large swaths of fabric installed high above a sunny space to create shade. Since Egyptian times, shade sails have been used to make...