How to Stain Furniture
by Guest Post on Jan 13, 2010
Staining an unfinished piece of furniture or refinishing an older piece is a great way to have a quality piece at a fraction of the cost. The process is fairly simple and depending on if you have to remove an old finish or not isn't that difficult to do.
Below are some steps you can take, to stain furniture and achieve a professional looking finish when you are through.
- If it's an old piece you are doing you will have to strip off the existing finish first. Remove any hardware on the furniture before starting. Use a quality paint stripper and follow the labeled direction for cleanup. Lightly sand the piece when finished. If there are any loose joints repair them now before proceeding to the next step.
- If there are any cracks that you feel need to be filled, use a wood filler that is close to the color of the stain you will be using. If possible just ignore them completely since this can add to the character of an older piece.
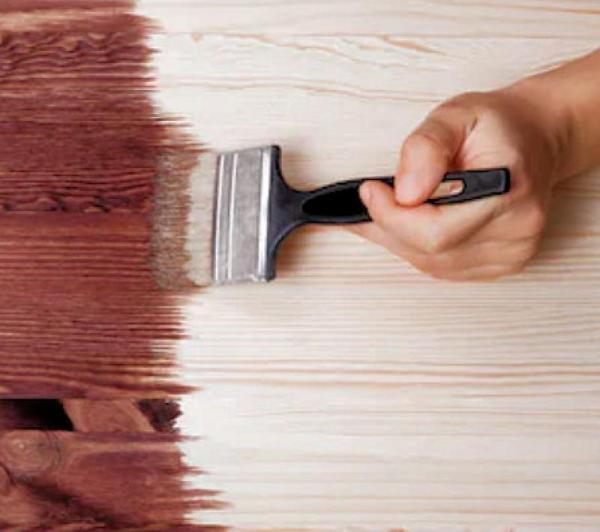
- Try and position the piece so that the part you're working on is horizontal to minimize and running of the stain. If this is not possible, then start at the bottom and work your way from there. Apply the stain quickly and evenly to coat the part you're working on. If a lighter finish is desired wipe off the excess immediately or if a darker finish is what you prefer to allow it to soak in for 15 or 20 minutes before wiping. The time will be determined by the shade you are looking for. Continue this process until the entire piece is done and allow it to dry thoroughly.
- Once dry, lightly sand with fine steel wool and apply a compatible sealer over the finish. This will help keep the stain from bleeding through and discoloring your finish coat.
- When the furniture stain is completely dry you can apply protective varnish to the finish. This time, work from the top down. Polyurethane is a popular choice but doesn't produce a high-quality finish. If it's a piece that will take a heavy beating it may be a good choice, but for a professional finish consider Lacquer. It can be sprayed (ideal) or brushed on if done properly.
Tips: Work in a well-ventilated area to protect yourself from any fumes. Oil-based stains provide the best finishes.
Popular Articles
Three Places to Spend Money on the Exterior of Your Home
When you have the exterior of your home remodeled, you are investing, time, energy and convenience into the project and you want to make sure that...
108446 Views
Homemade Headboards-Make an Upholstered or Wooden Headboard
Homemade headboards can add a lot of personality to any bedroom. They can be coordinated with existing furniture and room decor or they can be the...
81305 Views
When to Use a Brush, Roller or Sponge Brush
Brushes are a good choice for painting trim and woodwork. They are also useful for cutting in the edges around the top and bottom edges and corners...
74235 Views
Creating a Cottage Kitchen with Bead Board
Kitchen decor can range from modern and bold to elegant and elaborate by using strategic kitchen pieces. One of the most popular decorating trends...
59668 Views
Gas Fireplace Diagnostics and Troubleshooting
Follow these steps for diagnosing and troubleshooting Gas Fireplaces repairs. For the average DIYer, this may seem intimidating, depending on the...
36544 Views
Latest Articles
Signs You Need Professional Plumbing Repair: Don’t Ignore These Warning Signs
Ignoring the signs of a pending plumbing disaster can lead to significant damage and costly repairs. For instance, homeowners might not realize...
on Jan 20, 2026
Beneath the Surface: Why Professional Trenchless Sewer Line Repair
Beneath the Surface: Why Professional Trenchless Sewer Line Repair is Essential for Modern Homeowners
on Jan 14, 2026
Hydro Jetting Services: Unclog Your Pipes with the Power of Water
When faced with stubborn clogs and slow drains, conventional solutions often fall short. But with the innovation of hydro jetting services,...
on Dec 15, 2025
Why Professional Heat Pump Installation is Key to Maximizing Efficiency and Longevity
Heat pumps are a highly efficient means of heating and cooling homes, reducing energy costs and contributing to environmental sustainability. To...
on Dec 15, 2025
Why Professional Boiler Repair is Essential for Home Safety and Comfort
Maintaining a warm and safe home environment is paramount for any homeowner. Your home's boiler system plays a critical role in this, but what...
on Nov 5, 2025
Featured Articles
What Type of Licensed Contractor Should You Hire?
on Feb 28, 2017
Hire Contractors / Estimates

Looking for a specialty project? There are many types of contractors available for your home improvement needs. Finding the right type of...
Actions
Top Categories
- Garden / Landscaping / Patio — 264
- Kitchen / Bathrooms — 240
- Real Estate / Finance — 203
- Appliance / Repair — 186
- Interior Design / Decor — 184
- HVAC / Air Conditioning — 150
- Cleaning / Maintenance — 144
- Improvements / Remodeling — 131
- Plumbing / Basements — 121
- Floors / Tile / Hardwood — 116
- Safety / Security — 114
- Doors / Garages — 113
Articles Archive
More DIY Articles
Oak or MDF Skirting for Style and Substance?
Skirting boards may not seem like the most exciting part of home decoration or renovation plans but for most modern homes they are a necessity. Not...
Role Played by the Disaster Cleanup Companies for Restoring Your Prope
Life can be quite unpredictable. You can never be prepared for any type of untoward incidents, which may occur at any time. At the same time, you...
The Water Heater is Broken: Now What?
When you think about the easy projects homeowners can do by themselves, fixing a broken water heater is not the first that comes to mind. However,...
What’s the Best Way to Monitor Your Home Security: Smart Home or Home Security System?
Is security or convenience more important in protecting your assets? The two aren’t mutually exclusive. Here is how to make an informed...
5 Home Improvement Tips Sellers Should Not Overlook
When selling your house, thinking about ways to improve your home will become all too common. After all, even the most recently decorated homes...