
5 Tips to Dust Your Home Efficiently
by Guest Post on Jan 6, 2017

Absolutely everyone likes a clean house. A house with just a bit too much grime and gross stuff hanging around isn’t going to be impressing any of the guests you bring over. From carpet cleaning to vacuuming, everyone in the world likes a clean house.
But there’s also another fact of the world: your home gets dusty. It’s a fact of life and that fact isn’t going anywhere anytime soon. Every day you’ll be able to see a little bit more dust than the day before and eventually, it’ll get too much for you to handle.
You’ve got to dust the entire house, but you’re not sure how to do it in the most efficient manner. No one wants to spend hours dusting, so we’ve compiled some of the top tips to dust your home efficiently and effectively.
-
Microfiber Clothes Are Pretty Much The Only Way to Go.
You might think that it’s perfectly fine for you to dust your home with an old cloth or something else that’s just lying around. You would be terribly wrong on that one.
You’ve got to go with a microfiber cloth if you want to get a really good dusting. Microfiber clothes are specifically made to pick up way more dust particles than normal clothes that will just spread around the dust, rather than picking it up. It’s all about your tools in this battle!
-
The Method: Top to Bottom and Left to Right
There’s a specific method that’s going to make your dusting a lot more efficient. Start from the top of whatever you’re dusting to the bottom and go from the left of it to the right. That way, you’re bringing all of the leftover dust down to the bottom of the floor, which you can then vacuum up later.
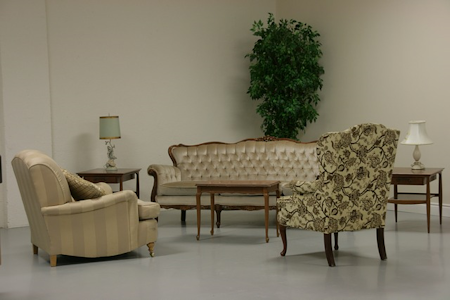
Plus, this method ensures that you won’t miss any spots by just haphazardly dusting.
-
Move Clockwise or Counter-Clockwise Around the Room.
This is another way to keep organized while you’re dusting. You don’t want to miss any of your furniture or appliances because you just went randomly through the room.
No, the best way to go about this is to move around the room in a clockwise or counter-clockwise direction, whichever is your preference. Plus, this gives you a goal to reach for. You start at one spot of the room and your goal is to dust until you’re back over at that spot!
-
After You Dust, Don’t Forget to Vacuum.
So, once you’ve got everything dusted, you might think you’re all done. Not so fast! Some of that dust has probably floated down to the floor and now needs to meet Mr. Vacuum. So, don’t forget to take out your vacuum cleaner and do a quick swipe in the rooms that you dusted to get the cleanest rooms possible.
-
Don’t Forget the Back of Various Appliances.
It’s not just the fronts of your furniture and electronics that get dusty. You should also head over to your kitchen and check out the backs of your various appliances like your refrigerator or stove. The backs of these can get incredibly dusty over time because you just don’t see them regularly and they’re kind of difficult to reach.
If you’re able to, get behind these appliances and do a quick swipe with your microfiber cloth. You’ll feel much better about the cleanliness of your house when you get into all of the possible nooks and crannies.
And bam! Your house should be dust-free and ready for what the world has in store. Dusting your house doesn’t have to be the absolute worst thing in the world. Just follow these easy tips and the next time you dust should take much less time and be a little bit more enjoyable for you.
Popular Articles
Three Places to Spend Money on the Exterior of Your Home
When you have the exterior of your home remodeled, you are investing, time, energy and convenience into the project and you want to make sure that...
110272 Views
Homemade Headboards-Make an Upholstered or Wooden Headboard
Homemade headboards can add a lot of personality to any bedroom. They can be coordinated with existing furniture and room decor or they can be the...
81637 Views
When to Use a Brush, Roller or Sponge Brush
Brushes are a good choice for painting trim and woodwork. They are also useful for cutting in the edges around the top and bottom edges and corners...
74598 Views
Creating a Cottage Kitchen with Bead Board
Kitchen decor can range from modern and bold to elegant and elaborate by using strategic kitchen pieces. One of the most popular decorating trends...
59990 Views
Gas Fireplace Diagnostics and Troubleshooting
Follow these steps for diagnosing and troubleshooting Gas Fireplaces repairs. For the average DIYer, this may seem intimidating, depending on the...
36811 Views
Latest Articles
How to Fix Water Marks on Bathroom and Kitchen Faucets
Water marks on faucets can make an otherwise clean kitchen or bathroom look untidy. These marks often appear as white spots, cloudy patches, or...
on Nov 7, 2026
Signs You Need Professional Plumbing Repair: Don’t Ignore These Warning Signs
Ignoring the signs of a pending plumbing disaster can lead to significant damage and costly repairs. For instance, homeowners might not realize...
on Jan 20, 2026
Beneath the Surface: Why Professional Trenchless Sewer Line Repair
Beneath the Surface: Why Professional Trenchless Sewer Line Repair is Essential for Modern Homeowners
on Jan 14, 2026
Hydro Jetting Services: Unclog Your Pipes with the Power of Water
When faced with stubborn clogs and slow drains, conventional solutions often fall short. But with the innovation of hydro jetting services,...
on Dec 15, 2025
Why Professional Heat Pump Installation is Key to Maximizing Efficiency and Longevity
Heat pumps are a highly efficient means of heating and cooling homes, reducing energy costs and contributing to environmental sustainability. To...
on Dec 15, 2025
Featured Articles
What Type of Licensed Contractor Should You Hire?
on Feb 28, 2017
Hire Contractors / Estimates
Looking for a specialty project? There are many types of contractors available for your home improvement needs. Finding the right type of...
Actions
Top Categories
- Garden / Landscaping / Patio — 264
- Kitchen / Bathrooms — 240
- Real Estate / Finance — 203
- Appliance / Repair — 186
- Interior Design / Decor — 184
- HVAC / Air Conditioning — 150
- Cleaning / Maintenance — 144
- Improvements / Remodeling — 131
- Plumbing / Basements — 121
- Floors / Tile / Hardwood — 116
- Safety / Security — 114
- Doors / Garages — 113
Articles Archive
More DIY Articles
Office Desks for Home Provide more Functionality
The top of a home office desk is an important feature as the size; make, texture, and color of the desk determine the selection of other home...
Transform Your Kitchen with These Design Tools
Your kitchen is one of the most valuable parts of your home. Whether you are having guests over and want to leave a good impression, or if you are...
Preventing Blocked Drains
There are few parts of our homes and businesses which can really cause a lot of problems like our drains. Blocked drains can lead to a whole range...
Tips on How to Build a Canopy Bed
Getting Started to Build a Canopy Bed. If you want the simplest way of building a canopy bed, you might want to consider just making a canopy...
3 Ultimate Tips to Decorating Your Home Office
When it comes to decorating your home, the home office is usually the last place you will decorate. However, studies show that having a clean,...